Common Computer Issues: Why Is My PC So Slow?

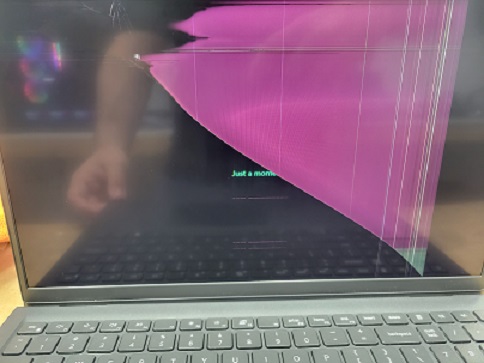
Are you tired of pressing the power button and having enough time to brew a fresh cup of coffee, just to come back and still be waiting for the login screen?

It’s 2026, and honestly this should be a thing of the past. If your system feels like it’s running through molasses and applications take an eternity to load, you aren’t alone. Here is a breakdown of the most common culprits behind a slow computer and how to fix them.

1. The Spinning Disk Bottleneck (HDD vs. SSD/NVMe)

⚠️ Critical Data Safety Disclosure

Before touching any hardware or attempting a drive upgrade, evaluate the health of your current system. If your computer is freezing constantly, making clicking noises, or you suspect the drive is actively failing, stop immediately. Back up your critical data to an external drive or cloud storage right away, or seek professional IT assistance. Heavy operations like cloning a failing drive can cause permanent data loss.

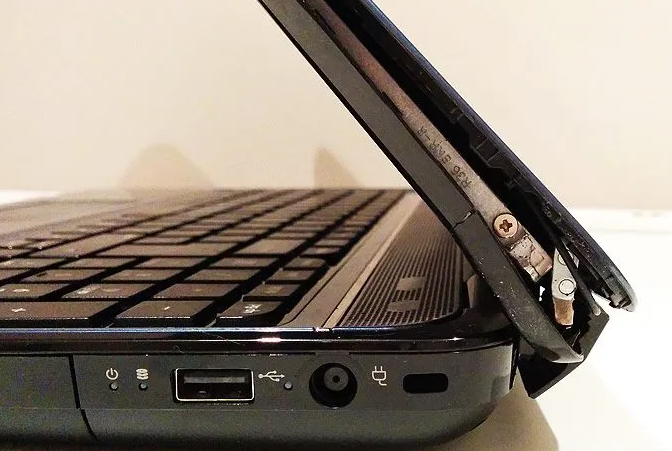
If your computer is a few years old and healthy but just slow, there is a good chance your system is still operating on a traditional Hard Disk Drive (HDD). HDDs are mechanical, meaning they rely on moving parts that naturally wear down, degrade, and slow down over time.

If you’re still on an HDD, the single best decision you can make is upgrading to a Solid State Drive (SSD) or an NVMe M.2 drive.

  • The Speed: SSDs and NVMe drives perform anywhere from 7x to 70x faster than traditional hard drives.
  • The Payoff: Your computer will boot up in less than a minute.

When you make the switch, you’ll have to decide between two paths:

  • Cloning: This creates an exact replica of your data and applications on the new drive. You keep everything exactly where it was, just exponentially faster. (See my step-by-step Macrium guide below!)
  • Fresh OS Install: About 50% of my customers opt for a clean, fresh install of Windows. While you do have to reinstall your applications, it completely eliminates digital clutter and gives your computer that authentic “brand-new” feel.

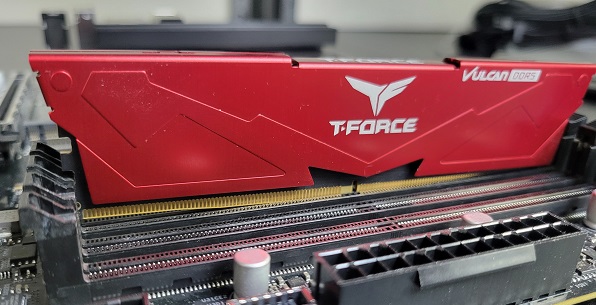
2. You’re Running Out of Digital Brain Space (RAM/Memory)

If you already have an SSD but your computer still stutters when you have multiple things open, your memory might be maxed out.

To check this, open up the trusty Task Manager (press Ctrl + Shift + Esc) and click on the Memory column. If your usage is consistently over 75%, it’s time for a RAM upgrade.

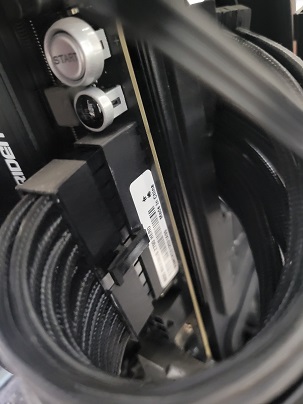
How much RAM do you actually need?

  • 16GB: Good for most everyday users, and standard office work.
  • 32GB+: Sweet spot, crucial for power users, heavy multitasking, and anyone who keeps a gazillion Chrome tabs open simultaneously.

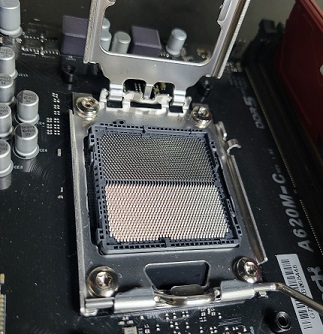
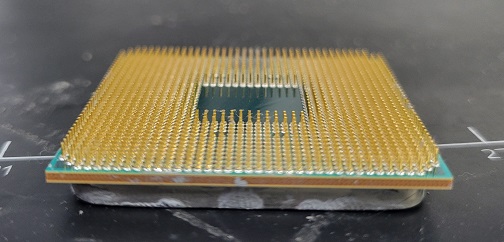
3. Your Computer Thermal Throttling

Computers, like humans, don’t perform well when they overheat. Thermal throttling occurs when your processor literally slows itself down to prevent its own hardware from melting.

If your fans sound like a jet engine taking off, it’s time to check your temperatures:

  • To check idle temps: Use a free tool like HWMonitor.
  • To stress-test: Use a tool like Aida64 to see how your CPU handles a heavy workload.

If your system is running hot, the culprit is usually dust buildup in the heatsink, or dried-up thermal paste between the processor and the cooler.

The Maintenance Rule of Thumb: Dust out your PC every two months (especially if you have pets), and replace your thermal paste every 3 to 4 years to keep things running cool and fast.

Step-by-Step: How to Clone Your Drive with Macrium Reflect

If you want to upgrade to an SSD without losing your files, preferences, and programs, cloning is the easiest route. Here is how to do it safely:

  1. Install Macrium Reflect on the computer you would like to clone.
  2. Launch Macrium and select the source drive (your old, slow drive) that you want to clone.
  3. Adjust partitions for smaller drives: If you are cloning from a larger drive to a smaller SSD, uncheck the partition directly after your main data partition (C: or D:). Macrium needs to be able to resize the main partition to fit the smaller drive, and unchecking the trailing partition allows it to do this.
  4. Select “Clone this disk…” located just under the selected source drive.
  5. Select your destination disk (the new SSD), follow the prompts, and double-check that your Source and Destination disks are correct before clicking Finish.
  6. Run and Swap: Allow the clone to finish. Once completed, power down your PC, unplug the original drive, install the freshly cloned drive, and boot it up to verify functionality.
  7. Clean up: Once you are happy with the performance, you can remove Macrium Reflect from the machine.

Troubleshooting Potential Errors

If your original drive is older or showing early signs of health degradation, the clone may fail with an error such as MFT Error 6. If this happens, Macrium will halt and ask you to run a disk check (chkdsk).

Because Windows won’t allow you to fully repair a drive while actively using it, you will need to schedule a chkdsk to run during a reboot:

  1. Click the Windows Start button, type cmd, right-click on Command Prompt, and select Run as administrator.
  2. In the command prompt window, type the following command exactly and press Enter: chkdsk /x /f /r
  1. The system will notify you that the drive is currently in use and ask if you want to schedule the volume to be checked on the next reboot. Type Y and press Enter.
  2. Reboot your computer. Windows will automatically begin the disk repair process before loading the desktop. Let this process finish completely, as it can take some time depending on the drive’s condition.
  3. Once the computer boots back into Windows, reopen Macrium Reflect and attempt your clone again.

Most Common Computer Issues and The Fix

Common Computer Issue #4: Bluescreens/BSODs

The dreaded Blue Screen of Death (BSOD) comes in many different flavors. If you’re lucky, the stop code or error message on the screen will point you in the exact right direction.

In my experience handling thousands of systems, most blue screens boil down to a handful of usual suspects. Before diving into specific error codes, there is a standard baseline triage sequence that you should always perform first.

The Baseline BSOD Triage Sequence

Regardless of the specific error code, these are always the first five actions to take:

  1. Check for Optional Windows Updates Outdated drivers are a massive catalyst for system instability.
    • Windows 10: Go to Settings (Win + I) > Update & Security and look for View optional updates.
    • Windows 11: Go to Settings > Windows Update > Advanced Options > Optional Updates.
    • Select all available driver updates and install them.
  2. Update the BIOS For major manufacturers like Dell, HP, and Lenovo, critical BIOS updates are often bundled into the optional Windows updates mentioned above. If they aren’t listed, visit the manufacturer’s support website, enter your system’s serial number or model, and download the latest BIOS version manually.
  3. Monitor System Temperatures Thermal throttling can trigger sudden crashes. Use a trusted utility like HWMonitor to check your CPU temperatures under load. If it’s running abnormally hot, the fix is usually as simple as dusting out the chassis or removing the heatsink to reapply fresh thermal paste.
  4. Run a Storage Health Check A failing drive will constantly drop data and cause crashes. Use CrystalDiskInfo to check the health status of your storage drives. If a drive returns a “Caution” or “BAD” status, back up your data immediately. Continuing to use a failing drive risks total data loss. At that point, it’s best to have a local repair shop clone or transfer your data to a new SSD.
  5. Analyze the Crash Dump Logs Windows quietly logs everything happening in the background. Instead of blindly guessing, you can use a tool like WhoCrashed. It parses the complex Windows minidump files and translates them into a detailed, human-readable report that points out the exact file or driver that caused the crash.

Common BSOD Error Codes & How to Fix Them

If you have completed the baseline triage and the system is still crashing, look closely at the specific error code displayed on the blue screen.

1. WHEA_UNCORRECTABLE_ERROR

This is a hardware-level error and one of the most common BSODs I encounter. It means Windows detected a catastrophic hardware failure. If your temperatures are fine and your drivers are updated, you need to look closely at your RAM, CPU, and Motherboard.

  • Isolate the RAM: Start by searching for “Windows Memory Diagnostic” in the taskbar and running the test. However, built-in tests don’t always catch intermittent faults. Try physically re-seating the memory modules. If you run multiple sticks of RAM, test the system using only one stick at a time, swapping them out to see if the crash persists.
  • Investigate the CPU: About a third of the WHEA errors I diagnose trace back to a faulty CPU. The only definitive way to test this is by component swapping, either testing your CPU in a known-good, compatible system or installing a test CPU on your board. Note that this type of hardware isolation is typically only possible on desktop PCs, as laptop CPUs are permanently soldered to the motherboard.

2. DRIVER_IRQL_NOT_LESS_OR_EQUAL

This code is almost always a software or driver conflict. In my experience, faulty physical hardware is the culprit less than 20% of the time here.

  • Leverage Proprietary Update Tools: Beyond standard Windows updates, use the official utility provided by your machine’s manufacturer (such as Lenovo Vantage, Dell SupportAssist, or HP Support Assistant). These proprietary tools are excellent at identifying specific, stable chipset and power management drivers that Windows Update might overlook.

3. INACCESSIBLE_BOOT_DEVICE

This error indicates that Windows has lost communication with the drive storage partition it needs to boot from. I most frequently see this surface right after cloning an old drive to a new SSD, or if a user accidentally changes their motherboard’s storage configuration.

  • Reset BIOS to Optimized Defaults: Turn on the computer and immediately tap the BIOS key, usually Delete, F2, F12, or Esc depending on the brand. Once inside the BIOS menu, locate the option to reset settings to “Defaults” or “Optimized Defaults”, save, and exit.
  • Verify the Boot Order: If a factory reset doesn’t work, head back into the BIOS and check the boot priority list. Ensure your primary storage drive is set as the first boot option. You do not want “Network Boot”, “USB Hard Drive”, or “CD/DVD” sitting at the top of the list.
  • Flashing a Corrupted BIOS: If the issue happens intermittently, look for a BIOS update. If the computer cannot boot into Windows at all to run an installer, use a working computer to download the latest BIOS file onto a USB flash drive. You can then use the built-in “BIOS Flash/Restore” utility inside the motherboard menu to update the firmware externally.

Summary

If you have exhaustively ruled out software drivers, updated your firmware, and verified that your temperatures are stable, you are likely looking at a failing motherboard, CPU, or memory kit.

Chasing hardware faults without spare testing parts on hand can quickly become difficult and expensive. If you find yourself stuck at this stage, reaching out to a trusted local repair center can save you a significant amount of diagnostic time and unnecessary component expenses.

Most Common Computer Issues and The Fix

Common Computer Issue #5: Physical Damage

Was your computer dropped, nudged, or maybe you spilled your dirty chai iced latte on the keyboard? Physical damage comes in all forms. Below I will list some of the most common damage we see regarding both laptops and desktops.

Laptops

Broken screen

A laptop screen that has been damaged by force.

Probably the most common physical issue we see with laptops is a broken screen. Usually this occurs when the laptop is dropped or pressure is applied to the top side. Luckily, the majority of laptop screens can be replaced, with parts being ordered online.

To find a specific LCD panel, try looking up the model of the laptop along with “LCD replacement” for example- HP 15M-AT000 LCD replacement. The price of the parts ranges from $60-150. The cost tends to be on the higher end when it is a touch screen.

TIP: Some manufacturers like Dell and HP have part-lookup tools that use the service tag or serial number to find the exact part number of the LCD screen and other components. HP Parts Surfer Parts For Your Dell

Now to fix the laptop, if you plan to do it yourself, look up YouTube videos specific to your model laptop. The other option is to pay a technician to do it, I would estimate labor costs to be $80-150.

Broken hinge

A broken hinge is oftentimes seen when the screws holding the hinge in place get pulled away from the back cover of the laptop. Causing this screen assembly to “split”.

Laptop with a broken hinge is depicted.

What causes this? Rarely it is from an obstruction in the hinge, like a cable. More often, it is the tension of the hinge itself that puts too much force on the screw points holding it together. This issue can be prevented by being careful and slow when opening and closing the laptop.

Replacing the LCD back cover is a similar process to replacing the LCD screen itself. Using the same methodology as the LCD screen, you can source the replacement parts by looking up the model along with the descriptor “LCD back cover”. You can also use a parts lookup tool to find the specific part number to ensure compatibility. HP Parts Surfer Parts For Your Dell

TIP: When replacing the LCD back cover, I highly recommend loosening the hinge nuts to allow for easier opening and closing of the laptop screen. This will prevent the issue from reoccurring.

As with the LCD screen replacement, YouTube videos are available for the DIYers, or you can have a computer repair shop do it for a labor of $80-150~. The process is different for every laptop so be sure to find a video/guide that accurately depicts your model laptop.

Liquid damage

It is common for spills to occur on the top side of the laptop where the keyboard is, and sometimes liquid seeps in from the side where there are USB and other ports open.

When this occurs, power off the device immediately and disconnect any batteries/adapters that can be removed.

The goal here is to let the device dry and clean up any visible liquid that is pooling on the device. If you are certain liquid has gotten INTO the laptop, it may require disassembling to clean up the liquid from inside the device. Use Q-Tips and isopropyl alcohol (70%+) to clean up sticky drinks like soda or coffee.

Do not power on the device until you are confident everything has dried. Big problems occur when you power on the device and there is liquid that shorts electrical currents on the devices components, causing permanent damage.

Desktops

Physical damage of desktops is not as common as laptops, as they are stationary devices and don’t move too much. We will go over a couple of physical issues you may run into.

Tackling these problems do require some disassembly of your computer. Only proceed when you feel comfortable working inside your PC. To gain this confidence, I recommend watching videos on how to open your computer case, or even watch some videos on how to build a PC. This will give you the insight necessary to diagnose these physical issues on your own. If you decide not to do it on your own, these insights will at least give you knowledge and resources to draw on to ask good questions of your computer technician.

Loose connections, memory seating

Maybe you moved and had to pack or ship your desktop PC and now it wont power on. It is possible that a connection got knocked loose or the memory slightly out of place.

The first thing to look at would be the memory. Usually memory modules should click twice, one on each end of the memory module. Go ahead and press on each end of your memory modules, if you hear a click, there’s a good chance it was not seated properly.

A stick of memory that is not fully seated into its slot.
This memory is not seated fully.

It does not hurt to remove the memory and re-seat the modules. Memory is usually held in by clips on either side that can be unlatched to release the sticks of RAM. On newer motherboards, there is only one latch on a single side of the memory.

While you are in the computer, look at all connections and make sure they are firmly secured and/or latched. Ensure all the power cables coming from the power supply are secured fully to the motherboard, storage devices, and graphics card if you have one.

Loose 24 pin motherboard power connector
A loose 24-pin motherboard power connector

Bent pins on Motherboard or CPU

Have you replaced or upgraded your CPU just to have your computer not boot up as expected?

Before assuming physical damage to the CPU or motherboard pins, be sure to update your bios as this could alleviate CPU compatibility problems.

Pins on the CPU or CPU socket are very fragile. The smallest amount of force in the wrong place can ruin a CPU or motherboard.

A motherboard CPU socket showing its delicate pin arrangement
LGA Socket with pins on the motherboard.

Take a look at your pins, whether they are on the CPU or motherboard. They should be uniform and nothing should really stick out. The pins are golden and reflective, so a bent pin can be easy to spot as it will look out of place.

A CPU and its golden pins.
AMD CPU pins

Depending on the severity, bent pins can sometimes be bent back into place. This requires a steady hand and some fine tweezers. I highly recommend using a magnifying glass to get a closer look at the pins. The goal is to bend the pin back to uniformity with all the other pins around it.

CPUs need to be installed with care and handled gently. They should not need to be forced into their sockets to fit.